



 You are here:
Toothbrush Embroidery vs 3D Puff Embroidery: Which Raised Effect Should You Specify?
 Release time:2026-11-13
 Views:
Written by Liu Ronghui | Dongguan Dobest Industrial Co., Ltd., Founder & Technical Director Last updated: 2026-11-11
Two techniques produce a raised effect on a garment, and buyers routinely treat them as interchangeable. They are not. One is built from thread alone; the other is built on a foam core that is stitched over and then trimmed away at the edges. That single structural difference decides how fine your lettering can go, how large the design can be, how the piece behaves in a wash, and what happens to the surface after ten wearing cycles.
This article compares only those two. It does not cover flat embroidery, chenille or appliqué except where a design forces the question — if neither raised effect is right for you, the flat embroidery comparison is the place to start. Every number below is a standard capability range from our own production floor, and the final result on your fabric is confirmed by sampling.
1. The short answer
Specify 3D puff when you want hard, die-cut edges, a pronounced shadow, and a shape that reads from across a room — block letters, bold logos, cap fronts, badge-style shapes with clean corners.
Specify toothbrush embroidery when you want a soft, fibre surface rather than a hard block, when your artwork has thinner strokes than foam can carry, when the design runs wider than a foam block allows, or when the garment will be washed hard and often.
The two are not competitors so much as different answers to the same brief: "make this stand off the surface." Puff answers with structure. Toothbrush answers with pile.
2. How each one is actually built
2.1 3D puff: the foam is the structure
Puff embroidery starts with a sheet of foam laminated to the fabric, usually 2.0, 2.5, 3.0 or 4.0 mm thick. The machine stitches a dense satin cover over the foam, and a trimming step cuts the foam back to the outline of the design. What remains standing is foam with thread wrapped around it. The 3D puff embroidery guide covers foam selection and the full parameter set.
Because the foam carries the height, the foam sets the rules:
- Minimum stroke width about 4.0 mm. A needle running a narrow channel shreds the foam on both sides of the stitch, the motif loses its support, and the letter collapses at the tip. This is the constraint that rules puff out for small type, fine serif logos, and thin script.
- Standard maximum design size 300 mm × 300 mm. Larger formats depend on base-fabric strength and how much foam the trimming step can handle. Beyond that, the practical answer is often to produce a standalone patch and attach it, rather than to embroider directly onto the panel.
- Cover-stitch density matters more than in flat embroidery. If density drops, the raw foam colour shows along the sidewalls. It is the most common basic defect in this technique and the one to inspect for on an approval sample.
- Heat is the enemy. Foam can shrink or distort at pressing temperatures. Press at low temperature with a pressing cloth, and avoid storing finished pieces under prolonged heavy compression.
The payoff is edge quality. The sidewalls come out as clean as a die cut, corners hold true right angles, and the shadow under the lettering is sharp. If your design is a wordmark that has to look engineered, this is the effect that delivers it.
2.2 Toothbrush embroidery: the thread is the structure
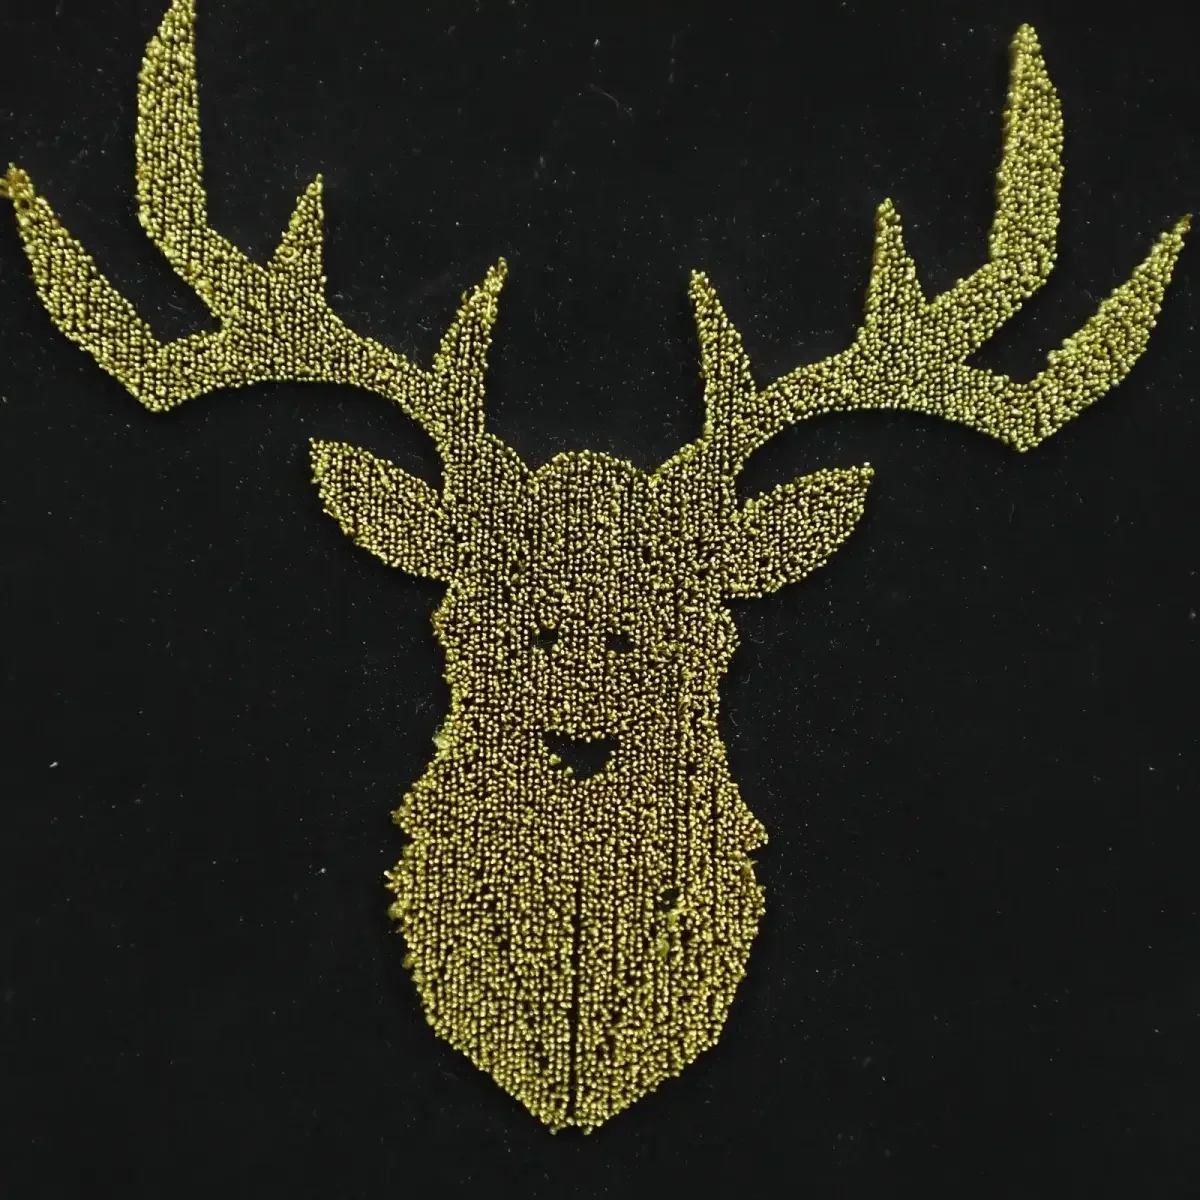
Toothbrush embroidery uses no foam at all. The pile is stitched as a dense mat of thread, and a shearing step cuts the loops open so the fibres stand up. What holds the pile upright is the root: the thread is heat-locked at the base from the back of the fabric, so each column stays where it was placed instead of unravelling outward. The toothbrush embroidery guide sets out the principle and the eight-application breakdown in full.
Removing the foam removes the foam's limits:
- Pile height from 1.0 mm to 10.0 mm, with 2.0–3.5 mm being the common working range for apparel and headwear.
- Minimum line width about 2.5–3.0 mm, noticeably finer than the 4.0 mm floor that foam imposes. A single line below roughly 1.5 mm scatters and blurs after shearing, so there is still a limit — it is just a lower one.
- Minimum letter height around 10 mm and letter spacing of at least 2.0 mm. Small type still needs room; below that threshold we would push you toward flat embroidery rather than sell you an effect that will not survive shearing.
- A single embroidery field of roughly 1200 × 800 mm, more than ten times the working area of a standard puff block.
- Height can vary inside one design by roughly 1.0–1.5 mm, which is how sculpted, layered relief is built without adding a second technique.
Common yarns are 120D/2 and 150D/2 polyester, with rayon used when a high-gloss surface is wanted. Stitch density is adjustable at the 0.08 mm level, which is what allows artwork with tonal transitions to be reproduced without visible banding.
2.3 What the structural difference means downstream
A puff motif is a composite: foam, adhesive, thread. A toothbrush motif is a single material: thread. That distinction surfaces in three places.
Washing. Foam is the vulnerable layer. It can distort under heat and, at the extreme, separate from the base cloth. A pile motif has no layer to delaminate, and because the thread root is locked at the base, the piece is less prone to shedding after washing. Neither technique is indestructible — for both, we recommend washing inside out below 40 °C in a laundry bag, and avoiding high-temperature drying and ironing.
Weight and drape. Foam adds a stiff panel. On a lightweight tee or a soft knit, a 3 mm puff block can feel like a plate. Pile is softer and follows the fabric.
Repair. A sheared pile surface can be trimmed and blended if a fibre pulls. A damaged foam sidewall cannot be rebuilt without re-running the piece.
3. Head-to-head comparison
| Control item | Toothbrush embroidery | 3D puff embroidery |
|---|---|---|
| Structure | Thread columns, no foam | Foam core wrapped in satin, trimmed to outline |
| Height range | 1.0–10.0 mm (common 2.0–3.5 mm) | Set by foam: 2.0 / 2.5 / 3.0 / 4.0 mm |
| Minimum stroke width | ≥ 2.5–3.0 mm | ≥ 4.0 mm |
| Minimum letter height | ≈ 10 mm | ≈ 10 mm |
| Maximum design size | ≈ 1200 × 800 mm single field | 300 × 300 mm standard |
| Edge quality | Soft, fibrous, feathered | Hard, die-cut, true right angles |
| Shadow depth | Moderate, diffuse | Strong, defined |
| Surface feel | Plush, brush-like | Firm, slightly boardy |
| Behaviour under heat | Stable | Foam can shrink or distort; press low with a cloth |
| Wash behaviour | Less prone to shedding after washing | Foam layer is the vulnerable part |
| Weight added | Low | Noticeably higher |
| Cost driver | Stitch count plus shearing passes | Foam material, laminating step, cover-stitch density |
| Typical substrates | Knits, fleece, denim, canvas, felt, leather | Caps, heavy fleece, denim, structured panels |
Every figure in this table is a standard capability range. Your fabric, artwork and wash standard can shift the feasible window, which is why we sample before quoting production.
4. Choosing by product and design
4.1 Caps and beanies
On a structured five-panel cap front, puff is the default and usually the right answer: the panel is flat and stable, the foam holds its shape, and 3 mm reads well at retail distance. Two situations pull the decision the other way.
One case is a ribbed knit cuff on a beanie. A rib stretches and recovers with every wear. Foam laminated onto a moving rib tends to crack along the stitch line, so a pile surface — which flexes with the knit instead of fighting it — is generally the safer specification.
The other case is fine or script lettering on a cap side panel. If the strokes fall under 4 mm, puff will destroy them; toothbrush embroidery can carry them.
4.2 Garments that get washed hard
Childrenswear, gym wear, team kit, workwear rental. The more aggressive the wash cycle, the more the argument favours thread over foam. If the customer's care label allows tumble drying, foam becomes a genuine risk and we will say so at the sampling stage rather than after the bulk run.
4.3 Large lettering across a back or chest
A back print that spans 400 mm or more exceeds the standard puff block. You can either split it into multiple puff pieces — which introduces alignment risk at the seams — or run it as toothbrush embroidery in a single field. On a 500 mm wordmark, the single-field route is usually cleaner and cheaper than a joined puff layout.
4.4 Designs that need tonal variation
Pile hides stitch banding. A gradient logo, a photographic mark, or a motif with layered depth reproduces more faithfully in sheared thread than in a foam block, because the foam gives you one flat plane of height with a hard step at the edge. If the artwork depends on gradual relief, that is a pile job.
4.5 Leather, PU and coated surfaces
Both techniques can run on leather and coated fabric, but the constraint moves from the thread to the base. Non-woven or coated substrates do not recover from dense penetration the way a knit does, so we use a backing-free route and control tension rather than adding stabiliser. This is a specification conversation, not a catalogue choice; send the material and we will run a test piece.
5. Cost, minimums and lead time
The two techniques do not have a fixed price relationship. Which one costs more depends on the design.
A small, bold, single-colour logo — say a 60 mm block wordmark on a cap — usually favours puff: the stitch count is modest and the foam does the visual work. The same wordmark at 4 mm script, or at 400 mm wide, favours toothbrush embroidery, because puff cannot physically execute it. Where both are feasible, the deciding cost factors are stitch count, number of colour changes, shearing passes for pile, foam lamination and cover-stitch density for puff, plus the backing specified.
Rather than quote a per-piece range that will not survive contact with your artwork, we quote against a real specification. To get a number you can plan with, send five things:
1. The artwork file, vector if you have it. 2. The garment or fabric it will sit on. 3. The finished size and the pile or foam height you want. 4. The backing you need — sew-on, heat-applied, hook-and-loop or adhesive. 5. Quantity and required delivery date.
Our standard commercial terms: MOQ 300 pcs, 3 free samples for simple designs, sampling in 24–48 hours, bulk production in 5–10 working days. Complex samples and multi-technique combinations are quoted individually.
6. Frequently asked questions
Q1 | Is toothbrush embroidery the same as flocking embroidery?
No, and the confusion is worth clearing up. Toothbrush embroidery makes embroidery thread stand up into columns. Electrostatic flocking is a printing and surface-treatment process that glues short fibres onto adhesive using static electricity — it belongs to flock printing, not embroidery. "Flocking embroidery" is a loose trade term for any embroidery with a pile surface, and buyers who search that phrase usually want a dimensional pile effect. Tell us the effect you want and we will tell you which method produces it.
Q2 | Can both techniques appear on the same design?
Yes, and it is often the right answer. A common build is a puff block letter with a toothbrush-embroidered outline beneath it, or a puff badge shape with a pile field inside. The limitation is registration: the two elements are stitched in sequence, so the artwork needs clearance between them or the trimming step will clip the neighbouring pile.
Q3 | Which one survives washing better?
Thread, generally. A pile motif has no foam layer to distort or separate, and the root is heat-locked at the base, so it is less prone to shedding after washing. That is a relative statement, not an absolute one — wash temperature, detergent and drying method still decide the outcome. Follow the care label, wash inside out below 40 °C in a laundry bag, and skip high-temperature drying.
Q4 | Can I use puff for small letters if I accept the risk?
You can specify it, but the foam will not hold. Below roughly 4 mm of stroke width the needle shreds the foam on both sides, the letter loses support and collapses at the tip, and the defect shows up as a crushed or ragged character. For small type we recommend flat embroidery or toothbrush embroidery instead, and we will say so on the quote rather than ship a known failure.
Q5 | Can either technique be applied to a finished garment?
Yes. Both can run as a standalone patch that is later sewn or heat-applied, which is how most brands handle production across multiple factories. Direct embroidery onto an assembled garment is also possible if the panel can be hooped flat — a cap front can, a finished sleeve usually cannot. For heat application we use a full-surface TPU film; for direct-on-garment work we apply TPU only at the embroidery area plus a backing cloth for skin comfort. Our re-positionable embroidered patch construction is covered by patent CN222896500U.
About this guide
Dongguan Dobest Industrial Co., Ltd. (Dobest) was founded in 2013 and works in computerised embroidery processing and specialty embroidery customisation, with toothbrush and chenille embroidery as its main focus. The company is registered in Humen, Dongguan, Guangdong, China (USCC 91441900076690255J). The factory runs 30+ computerised embroidery machines, including 15 dedicated toothbrush-embroidery machines, in a 3,000 m² plant with a regular annual capacity of 1.5 million pieces. We are a manufacturer, not a trading company, and we support on-site meetings and fast sampling.
We have passed third-party factory audits (Disney ILS, adidas SEA); an audit result describes a factory at a point in time and does not indicate a current customer relationship or any brand endorsement. Raw materials are supplied by qualified suppliers.
If you are deciding between puff and pile for a specific design, send the artwork and the fabric. We will sample both and let you compare them side by side rather than argue from a specification table.
Contact: Request a sample or a quote | More on our factory and equipment

 2/F, Bldg E, Jinmao Xincheng, No.7 Jiedong South Rd, Xiaojiejiao, Humen, Dongguan, Guangdong, China
 mclau@dobest.hk